7 Easy Ways to Freshen Up Your Print Website

The day-to-day effort it takes to own and operate a print business can leave little time for anything else. But when the daily grind keeps you head-down and plugging away, time can pass by much more quickly than you realize. By the time you do get a chance to look up, you might be surprised that things you once thought were running like a well-oiled machine now need a little freshening up. Freshen Up Your Print Website with These 7 Tips If it’s been a while since you’ve focused your attention on your website, here are seven ways you can breathe new life into your website. 1. Try Out a New Website Theme One of the quickest and easiest ways to revamp your website is to give it a facelift with a new theme. Whether you want to stand out and be a print hero, like clean styles or eye-catching video, or simply prefer to highlight your local presence, you can easily find the perfect starting point to a whole new look. As your print business evolves, so should your website. Does your current look and feel reflect your business now and in the new future? Or, does your website
Experience A Performance Evolution

Fluidity. It’s our business. After all, how useful would it be to use yesterday’s technology and service experience for tomorrow’s needs? It’s in that spirit we wish to share six recent feature updates we’ve made to the websites from Marketing Ideas For Printers. With these updates, you can now: Complete/Re-open Individual Jobs Create Custom Send-A-File Questions Place Entire Order Level Tracking Numbers Edit Help Center FAQs Submit Partial Orders Use Product Category External Links To dig into the details of these features, it may be a bit of heavy reading if you don’t already have a website with us. But, if you’re interested in learning what we’ve been up to, keep reading. 1. Complete/Re-open Individual Jobs With this feature, your customers won’t have to wonder where their orders are. You have complete control over your workflow and can communicate on the fly to let your customers know exactly where in the production process their orders are. Once an order has been marked as completed, your customers can even place a quick and convenient re-order for that job. Need to make an update after a job has been closed? We’ve got your covered! Just re-open the job ticket and you’ll be
The Activity Log: When Emails Aren’t Enough

Lemons are no fun unless you can turn them into lemonade. We encountered a lemon recently when something indestructible, the email notification system in Websites For Printers websites, broke. Well, nothing in life is ever fully indestructible, but of everything out there, email notifications from our websites are about as close as you can get. Reliable is a term that could easily be associated with those email notifications. So much so, that many of our clients come to rely very heavily on those notifications – it’s the trigger that lets our website customers know something is happening on their website and it’s time to spring into action. On the rare occasion that there really is a hiccup in that system, the team here at Marketing Ideas For Printers makes sure that those notifications get back to normal as soon as possible. That lemon occurred on Monday, September 14th. The notifications stopped flowing from the servers, and our team sprang into action to alert our clients to that fact and recommend that they keep a close eye on their workflow page for any activity (new orders, approved proofs, etc.). While that approach works for the rare instances when it’s needed, it left us feeling that there
An Auto-Fill Improvement for uDesignIt!
We have a small, yet powerful update for printers using uDesignIt! on Websites For Printers websites. Your customers can now have their physical address information auto-fill the form for document personalization. Business cards provide the perfect case study. Up to this point with uDesignIt!, the website has used your customer’s account information (name, phone number, email address, etc.) to pre-populate information in the document being personalized. A pre-populated order form with a preview of the finished document looks something like this: But, notice there’s something missing: the address information. The difficulty comes when your customer’s account contains multiple addresses. For example, they may have a work address and a home address associated with their account. Which address information should the website use to pre-populate the order form? Now, your customer can decide! Here’s what happens: If there’s only one address in the customer’s account, it’s pretty straightforward; the website uses that address. However, if there are multiple addresses associated with the customer’s account, the website will default to the last address used and allow the customer to select a different address. Here’s a short 30-second video that shows how it all comes together. It’s ridiculously simple for your customers to use, and the best part is, it’s
Order Forms Like You’ve Never Known Before!
Open a can of outstanding, we have some important news to share! It’s time to reveal a very big project that we’ve been working on for you; we are ready to roll out an update to the Websites For Printers order forms! The Best of…Everything! This update includes the best of the original Level 1 website order forms, the best of the Document Library order forms, and the best of the current websites’ order forms. These “best ofs” combine together to create a highly customizable, functional, and (dare we say) beautiful order form system on your Websites For Printers websites. We’ve also added items that we believe will show up on your “best of” list pretty quickly…things like the return of global questions, where you can define your question once and use it multiple times throughout all of your website order forms. We’ve also added question rules, so that the answer to one question (envelope size, for example) will determine the display of other questions (window selections, in our envelope example). Streamlined Pricing Management The new order forms will streamline the way pricing is displayed on your website. There’s now one place to manage all pricing displays for each order form. You’ll have the option to display everything from no pricing at all to a price calculated in real-time using a Harmony-enabled connection
Creating Your Account at MI4P.info
We recently announced the passwords are being removed from the Ink Inc. packages. Instead of using passwords, the Ink Inc. packages will be secured by placing them behind the login of your MI4P.info account. If you haven’t already done so, it’s now time to create your account! The following video (4:36) explains how Ink Inc. customers can create an account at MI4P.info: http://youtu.be/vvWzf-PunfM Do you have questions about your MI4P.info account or your Ink Inc. packages? We’re here to help, just give us a call at 800-736-0688.
No More Passwords on Ink Inc. Packages
Starting with the March 2015 Ink Inc packages (which will be released in mid-January), Ink Inc. customers will begin retrieving Adobe InDesign files (and related artwork files) in a brand new way! The learning curve is pretty tame on this change, so if you consider yourself an old dog and hate learning new tricks, there’s no reason to worry. In fact, you’ll probably find this change makes things a lot easier for you, because we’re dropping the passwords that protect the monthly Ink Inc. packages. Instead of using passwords, the packages will be protected by placing them behind the lock and key of the Marketing Ideas For Printers Info Center at MI4P.info. Huh? Info Center? MI4P.info? What’s that? That’s where everything related to your account with Marketing Ideas For Printers is managed. (If you’re a Websites For Printers customer, you may already be familiar with the Info Center and MI4P.info. Now, you’ll find your Ink Inc. account information there as well.) Each month, we’ll continue to send you an email when the Ink Inc. packages are ready. Instead of including your Ink Inc. passwords, that email will contain a link that directs you to log in to the Info Center at MI4P.info to download your Ink Inc. packages. In
You Can Sell More Printing with Great SEO
Who do you think is going to make more money? A printer whose web address appears on page 25 of your search engine results, or on page 1? Here’s the story behind that loaded question. If you search for “Ohio Printers” you’ll see Northern Ohio Printing (nohioprinting.com) right at the top of the list of Google’s organic search results. Northern Ohio Printing (nohioprinting.com) used to be on page 25, but now, nohioprinting.com is on page one … in the #1 position! How does something like that happen? For Northern Ohio Printing it happened because they upgraded their Level 1 website with Websites For Printers to the current Websites For Printers platform. We recently created a helpful web page you can use to learn about the SEO improvements that lead to more opportunities to sell printing. Selling more printing: that’s the very best reason to move to the current Websites For Printers platform. Want to get the sales opportunities that come with great SEO? We’ve got you covered!
A Major Send a File Update
We have exciting news…but only if your customers send you files electronically. (That was a joke — of course your customers send you files electronically!) We’re making some major improvements to the Send a File process on our websites, and the enhanced Send a File tool is now available on our demo websites for you to kick the tires. Every single improvement we made was focused on the goal of making it easy for your customers to buy printing from you. Among the improvements are: Your customers can now access the Send a File tool from any page in your website, not just their account page. Files start loading immediately upon selection, while your customers continue to provide file information. This means the files get a head-start on the transfer; your customers will think they hit turbo-boost! The whole process has been streamlined, so your website visitors never have to say, “Just send the file already!” Attaching files to existing orders is now a simple point-and-click. Now your customers can “fire and forget” their files. Once they’ve selected their files and clicked “Send”, their work is done; the website will do the rest. We’ll turn it on for all Websites
New Tech Tip in the Ideas Collection: Add Some Sparkle With the Symbolism Tool
I truly can’t get enough of graphic design. There’s always something new to learn, and often times it seems there’s more than one way to get successful results. Some routes save more time than others and, incredibly, the time saved using Adobe Illustrator’s Symbolism Tool can be measured in hours. Wow! That’s pretty amazing, no matter how you look at it. The Symbolism Tool helps you create elaborate, professional designs that use the same graphic element with varying colors options, sizes, positions, opacities, and tints. It takes something tedious and frustrating and condenses it down to a few simple, easy steps. No matter what your experience level is with Adobe Illustrator, this tool is incredibly quick to learn and user-friendly. My first exposure to the Symbolism Tool was in creating the design for the newest Design Tip added to each Websites For Printers website’s Ideas Collection: Add Some Sparkle to Your Next Design With the Illustrator Symbolism Tool. As I was working on this Design Tip I was pleasantly surprised by the versatility and power found in the Symbolism Tool. With a few simple clicks I was able to create visually stunning design both quickly and easily. It was exciting for me to learn about this new tool. I have
The MI4P Process
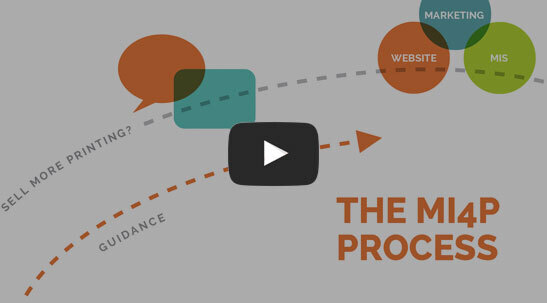
This two-minute video will show you how we take you through Our Proven Process. No surprises; no bumps in the road!
It's worked for hundreds of printers just like you; it will work for you, too! Download the MI4P Proven Process PDF below, and follow along.
PDF: The MI4P ProcessSay Hello
"*" indicates required fields
Who We Are
What We Do
Marketing Ideas For Printers
5990 14th Street South
Fargo, ND 58104
(701) 241-9204 (800) 736-0688
© 2026 Marketing Ideas For Printers
Our Privacy Policy | Terms of Service
