New Design Tip in the Ideas Collection: Grab Them Right Out of the Gate
We love adding fresh content to Websites For Printers websites! Earlier this week we added a new Design Tip to the Ideas Collection of the Websites For Printers websites. The new tip, Grab Them Right Out of the Gate, educates print buyers on how to use a gate fold to present big information in a small brochure. This is the kind of information that not only educates your website visitors, but positions you as the go-to printer with answers and solutions. Have a look at Grab Them Right Out of the Gate as it appears on one of the Websites For Printers demo websites. The new tip made its appearance not only on the website, but also in the latest issue of the twice-monthly Printer@Work email newsletter built into each Websites For Printers website. Each issue of Printer@Work features a tip from the Ideas Collection plus more fun sales-building content.
Bigger Vehicles, Bigger Email
My family loves camping. We started camping nine years ago, back when our kids were two, four, and six years old. We drove a GMC Yukon, hooked the camper up to the hitch, shoved the kids in the back seat, and hit the road. Traveling was a blast! We’re getting ready for this year’s camping season and it’s pretty much the same formula, but with one important change. My family informed me that in order for us to have a successful (and by successful they mean “happy!”) camping season, we would need a tow vehicle with three rows of seating instead of two. You see, nine years later the kids were getting bigger, but the Yukon wasn’t. So a few weeks ago, with a certain amount of sentimentality, the Yukon left our family, and our driveway welcomed a new-to-us Chevy Suburban with three rows of seating. Let the camping season begin! Email is like that too. “The kids were getting bigger but the Yukon wasn’t,” is replaced by “The files are getting bigger, but the email capacity isn’t.” That’s changing, as of June 1, 2014! You’re about to get more email capacity, and unlike my purchase of the Suburban, this upgrade is pretty tame on
Expanded Reorder Capabilities
Here’s some good news for our current Level 1 website customers looking to upgrade, as well as those who’ve upgraded from a Level 1 site in the past: All Orders Can Now Be Reordered On Level 2 and Level 3 websites, customers have always been able to place reorders for their document library items. However, orders placed using the Place an Order, Request Estimate, Send File and JobReady order forms on your Level 1 website could not be reordered because they were incompatible with the new system. But thanks to some updates to our system, it is now possible to allow your customers to reorder any orders that were placed on your Level 1 site, no matter what order form they used. This is just one more way to make it fun and easy for your customers to buy printing from you. By Request This process requires some heavy lifting, so it’s not automatically part of your upgrade. But if you’d like us to open up all of your previous orders for reordering, just let us know. There is no cost for doing so. Already upgraded your website? That’s not a problem. We can still convert your order history to
A Change To PDF Printing Settings
The Way Things Were For several years, our websites included a feature that allowed you to activate privacy features on PDFs that would automatically turn off your customers’ ability to print PDFs sent to them through your website. This way, printers could be confident that unscrupulous customers couldn’t take a PDF proof they receive and either print it themselves or bring it to another printshop to have it printed. This was a helpful feature in its time, but unfortunately appears to have run its course. It’s come to our attention that there is a conflict between newer versions of Adobe Acrobat and this site feature. The software we are currently using to do this can be upgraded, but at a cost that is prohibitive for our purposes. And frankly, it’s redundant, because Adobe Acrobat Professional has provided the ability to set printing restrictions for several years now. Going Forward Therefore, we are discontinuing this feature imminently. We have conducted an internal study and found this affects approximately 60 printshops, and we’ll be contacting those printshops over the following week. With this change, you will need to manually assign permissions for the files you send out. Adobe Acrobat Professional has the
Minding the Little Things
Every now and then, we like to give you a peek “behind the curtain”. This week, we made a simple update to one of the Control Center settings pages that we thought you might find interesting. Here’s the situation: we wanted to do a little something extra to help make the Browser Window Title Settings page easily communicate what the setting does (for those of you following along, that page is under “My Website”, in the “SEO” sidebar menu). In many ways, it was fine the way it was. It had on-page instructions, and even had a sample image of where page titles appear in a browser window. Pretty straight-forward. But we wanted to make it better. So, we replaced the sample image that shows where web page titles appear in web browsers with live-editable samples of how your title appears in browsers, even as you type it! See for yourself by playing the 8-second video below… http://youtu.be/m7gegJdY-ro It’s not groundbreaking. It’s not going to revolutionize the way you use the Control Center. In fact, some users may never even use the page. But we thought it was a good example of our continuing focus on making the websites the
Introducing Video Callout Buttons
Say It With Video Each Level 2 and Level 3 home page has between four and six callout boxes designed to call special attention to other pages on your website that you wish to showcase, or to deliver a special marketing message. We offer several pre-built callout boxes for your convenience, but you also have the ability to use our easy editing tools to create your own. Previously, you could add text and images only — but now you can add videos to your callout boxes as well! And talk about a great presentation for the video! We built the page to play the video in full-page view for your visitors, rather than simply playing within the callout box. Be sure to watch this week’s Lightning Round Webinar, where we introduced this exciting new feature for our Level 2 and Level 3 sites. Always Busy in the Lab But that’s just the most recent update. We’ve made several other updates to the Level 2 and Level 3 websites, including major updates, bug fixes, and subtle usability tweaks in recent months. Two notable major changes are the ability to apply custom website colors, and the ability to customize home page “slider”
Introducing DesignEdit
Several of our recent webinars have focused on one of our most work-in-progress projects, Cumulus. But Cumulus is the project’s code name. This week, we’re moving from the code name to the real name: DesignEdit. You’re going to love DesignEdit! It’s an online design tool featuring over 10,000 editable templates, many with industry specific text and imagery, with new templates being added each week. Almost all of the templates allow your customers to replace existing images either with their own images, or images from a library of over 14 million high-quality images. We hope you’re as excited as we are, and you won’t have to wait much longer — our development team is targeting the release for Fall 2013. To help you prepare for the release of DesignEdit, we’re providing a special discount to help you get more for your money when the product is released. We’re calling it the “Money Multiplier”. The Money Multiplier was first introduced in our August 15th Webinar, but here’s the executive summary: you can get up to 20% more for your money when you pre-pay for your designs!
InDesign Backward Compatibility Through CS2
It’s a puzzle we’ve faced several times in the past with our Ink Inc newsletters: how can we provide files that are usable with the most current versions of InDesign, but make them accessible to our customers who may still be working with prior versions? Starting with last month’s packages, we’re happy to say our files are now compatible with Adobe InDesign CS6 all the way back through CS2! For those of you that really want to “geek out”, heare’s the rest of the story: Previously, in addition to the native InDesign CS5 files we were providing our files (upon request) in InDesign’s native compatibility format, IDML. That worked fine, but had one important drawback — it was only compatible back to CS4. So we’re now also including an additional format, INX, which expands our compatibility all the way back to CS2. For your convenience, all formats are now included in a single package file, so there is only one download.
Approvers Allowed to Make Changes to Jobs
Approvers are now able to make changes to the jobs initiated by the original order-placer. As an approver in the order approval area, click on the gray bar to view the specifications of the job to be changed. At the bottom of the specifications table, click the “Make Changes” link. On the order form page that opens, make the desired changes to the specifications. Click “Save Changes” at the bottom of the order form. The approver will be redirected back to the order approval area to approve the order or make changes to additional jobs within the order.
Do You Use QuarkXPress?
Beginning with the August 2013 issues of our packages (mailing out in June), we will provide the Ink Inc. page layout files exclusively in Adobe InDesign format. Over the past few years, we have noticed a steady decline in QuarkXPress use among printers and designers. In fact, the number of Ink Inc. customers who use the QuarkXPress files we provide is very, very low. Our last issue to include QuarkXPress files will be the July 2013 packages, which will go out in May. We wanted to make sure you had plenty of notice before we make this change. If you rely on QuarkXPress to produce your Ink Inc. mailers, we recommend investing in Markzware’s ID2Q software, which is what we currently use to convert the Ink Inc. files from InDesign to QuarkXpress. The software works well and is available for both Mac and PC. More information is available on their website at http://www.Markzware.com.
The MI4P Process
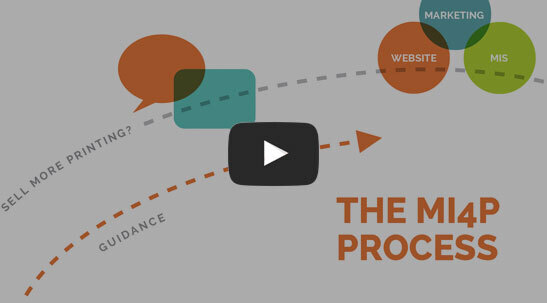
This two-minute video will show you how we take you through Our Proven Process. No surprises; no bumps in the road!
It's worked for hundreds of printers just like you; it will work for you, too! Download the MI4P Proven Process PDF below, and follow along.
PDF: The MI4P ProcessSay Hello
Who We Are
What We Do
Marketing Ideas For Printers
5990 14th Street South
Fargo, ND 58104
(701) 241-9204 (800) 736-0688
© 2025 Marketing Ideas For Printers
Our Privacy Policy | Terms of Service